
A bright ridgeline can turn a great hike into a squinting contest fast. The right pair does more than finish your trail outfit: the essential features for hiking sunglasses protect your eyes from intense UV exposure, reduce distracting glare, and help you spot rocks, roots, and changing terrain with confidence. Whether your plans involve a neighborhood nature trail or a full day above the tree line, your sunglasses need to work as hard as you do.
Why Hiking Sunglasses Need More Than Good Looks
Style matters – a frame you love is a frame you will actually wear. But hiking puts sunglasses through more than a quick walk from the car to the coffee shop. Sunlight reflects off water, pale rock, snow, and sand. Wind carries dust. Sweat makes frames slide. Trails move between open sun and deep shade, sometimes within a few steps.
That is why hiking sunglasses should balance eye protection, visual clarity, a secure fit, and a look that feels like you. You do not need the most expensive pair in the outdoor store. You do need lenses and frames chosen for the way you hike.
Essential Features for Hiking Sunglasses
1. Full UV400 Protection
Start here every time. Look for UV400 protection, which blocks both UVA and UVB rays. Those rays are present on clear days, overcast days, and cool-weather hikes alike. A dark lens without proper UV protection is not enough. In fact, it can be a poor choice because your pupils may open wider behind the tint while harmful rays still reach your eyes.
UV protection is especially valuable at higher elevations and around reflective surfaces. If your hiking calendar includes alpine routes, beaches, desert trails, or snow-covered paths, make this feature non-negotiable. Think of it as sunscreen for your eyes.
2. Polarized Lenses for Glare Control
Polarized lenses cut the harsh reflected glare that bounces up from lakes, wet rocks, car hoods, pavement, and light-colored trails. The difference can feel immediate: less eye strain, more comfortable vision, and better ability to read the ground ahead.
For most hikers, polarization is a smart upgrade. It is particularly helpful near water and during long, bright days when reflected light wears your eyes out. Polarized sunglasses also transition beautifully from the trail to the drive home, making them a practical pick for active weekends.
There is one small trade-off. Some digital displays, such as a phone, GPS, or watch screen, can appear darker or change color at certain angles when viewed through polarized lenses. Most people adjust quickly by tilting the device, but it is worth knowing if you rely on screens for navigation.
3. Lenses With the Right Tint
Lens color is not just a style decision. It affects how the trail looks and how your eyes feel in different light.
Gray lenses keep colors close to natural and work well for bright, sunny conditions. Brown or amber lenses can boost contrast, making uneven dirt, rocks, and roots easier to pick out. Green lenses offer a comfortable middle ground with balanced color perception and glare control. For hikers who move through mixed conditions, a medium gray, brown, or green lens is often an easy all-purpose choice.
Very dark lenses are great for intense midday sun, but they can feel too dim under thick forest cover. Lighter tints may be more comfortable in changing light, though they will not give the same relief on an exposed summit. Match the tint to where and when you hike most often.
4. A Wraparound or Well-Covered Frame
Side light can be just as annoying as light directly in front of you. A gently curved, wraparound frame helps shield your eyes from rays coming in from the sides. It can also reduce wind, dust, and trail debris, which is a major plus on dry, open routes or fast-moving bike-and-hike days.
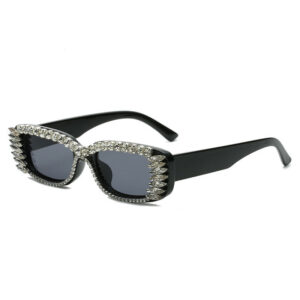
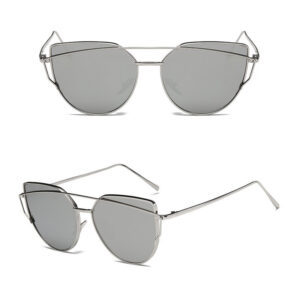
A full sport wrap is not the only option. Oversized square frames, curved aviators, and other wider designs can provide strong coverage while keeping your look more casual. The best choice is the one that covers your eye area well without pressing against your temples or cheeks.
5. A Lightweight, Stay-Put Fit
Sunglasses that slide down your nose every five minutes are not trail-ready, no matter how good they look in a mirror. Look for lightweight frames that sit securely without pinching. Comfortable nose pads, textured temple tips, and a close-but-not-tight fit can make a big difference once you start sweating.
Try to avoid frames that touch your eyelashes or rest heavily on your cheeks. When lenses repeatedly fog or rub against your skin, comfort disappears quickly. A well-fitting pair should feel stable when you look down at the trail, turn your head, or bend to tighten a bootlace.
If you have a smaller or narrower face, do not assume a large sport frame is your only outdoor option. A closer-fitting rectangular frame or medium-size wrap can offer better stability and coverage. For wider faces, look for frames with longer temples and a roomier front rather than forcing a narrow style to work.
6. Durable, Impact-Resistant Materials
Hiking has a way of testing gear. Sunglasses get dropped on gravel, stuffed into packs, bumped by trekking poles, and sometimes sat on at lunch. Durable frames and impact-resistant lenses are worth prioritizing, especially if you hike often or travel with kids.
Polycarbonate lenses are popular for active use because they are lightweight and resist impact well. Flexible plastic frames can also be a good choice for everyday trail wear, since they are generally lighter than metal and more forgiving during accidental drops.
Durability does not mean choosing a bulky frame. Plenty of sleek styles offer an easy, low-weight feel. The goal is simple: sunglasses that can handle real outings without becoming another fragile item you have to baby.
7. Scratch-Resistant and Easy-Care Lenses
No lens is completely scratch-proof, but a scratch-resistant coating helps your sunglasses stay clearer over time. That matters when you are packing them in a day bag with snacks, sunscreen, keys, and trail maps. Scratches scatter light and can make sunny conditions feel more irritating than they should.
Care is part of the equation. Store your sunglasses in a case or soft pouch when they are not on your face, and rinse away dust before wiping the lenses. Rubbing dry grit across a lens is an easy way to leave marks. A clean microfiber cloth and a little routine attention can keep your view sharp for many hikes to come.
8. A Style You Will Reach for Every Time
The best hiking sunglasses are the ones that make it out the door with you. That is where personal style earns its place. Choose a frame shape and color that fits your everyday wardrobe, whether that means classic black rectangular sunglasses, bold mirrored lenses, sporty wraps, or a retro-inspired aviator.
A versatile pair can look sharp at brunch, on a road trip, and halfway up a trail. If you hike frequently, having a dedicated active pair is useful. If you prefer one pair for everything, focus on neutral colors, polarized lenses, and a frame with enough coverage for outdoor use. Affordable sunglasses make it easier to choose function without giving up the style that feels most like you.
How to Choose for Your Favorite Type of Hike
Your usual terrain should guide your final decision. For woodland walks with frequent shade, choose a comfortable medium tint that will not make dark sections feel too dim. For exposed mountain, desert, or beach trails, prioritize UV400 protection, polarized lenses, and generous coverage. Near lakes and rivers, polarization is especially helpful for cutting reflected glare.
For fast hikes, trail running, or routes with lots of elevation change, a lightweight wraparound frame with a secure grip is usually the strongest fit. For relaxed travel days and scenic walks, an oversized fashion-forward frame with polarized, UV-protective lenses can offer plenty of comfort while keeping your outfit on point.
Parents should take the same approach for young hikers. Children’s sunglasses need dependable UV protection and a fit that stays put during playground stops, creek crossings, and family photos. Bright colors can make them more fun to wear, which is a win when you are trying to build good sun-safety habits early.
A Quick Trail-Ready Check Before You Go
Before your next hike, put your sunglasses on and look down, side to side, and toward bright light. They should stay in place, cover your eyes well, and leave your vision clear instead of distorted. Check for UV400 labeling, consider polarization for glare-heavy conditions, and make sure the lens tint matches the day ahead.
The trail is better when you can focus on the view instead of fighting glare or constantly adjusting your frames. Pick sunglasses that protect your eyes, fit your pace, and make you feel good from the trailhead photo to the last mile back.